

Kubernetes services expose apps running as a set of Kubernetes pods using a single DNS name. In addition, Kubernetes services provide load balancing between the pods. Of course, I’ll demo how to manage services using kubectl. Keep reading to find out more.
Introduction
In Kubernetes Deployments Demo we used kubectl port-forward to expose app running as the deployment of several pods. Then, we discovered that deployment pods are not load-balanced and only a single pod serves the traffic.
In addition we saw in Kubernetes Pods Demo that pods live only once. Hence, pod ip is ephemeral. Then, of course, we can’t rely on it while connecting to an app running inside a pod. Seems like we need something that will act as a gateway to a set of pods. Pods may come and go, be scaled up or down. Still the app is accessible by its clients. Ideally, app clients don’t need to track app pods and their ips. They want to consume app endpoints using DNS resolvable name. That’s exactly what Kubernetes service provides in addition to load balancing between the pods.
Kubernetes Services Concepts
So we already know that Kubernetes service is a gateway to a set of pods. Of course, it has its own virtual ip address. However, unlike pods, services are not ephemeral. Also, we mentioned that services provide load balancing to their pods. But, how are pods associated with a service? Right. Using a label selector, similarly to Kubernetes deployments.
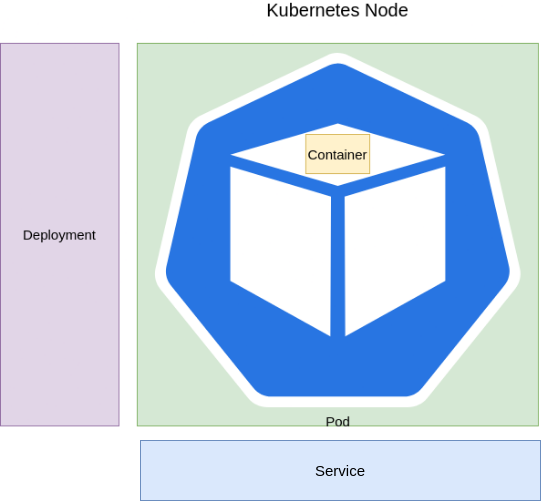
Kubernetes ServiceThere are several Kubernetes service types:
Kubernetes Service Types
ClusterIP
The service is reachable only inside Kubernetes cluster.
NodePort
The service is reachable by port on each Kubernetes cluster node via service name and a port.
LoadBalancer
The service is reachable externally. Cloud provider’s load balancer usually proxies to LoadBalancer service.
ExternalName
The service acts as a proxy for some external service.
Kubernetes Services Demo
It’s time for a Kubernetes services short demo. Before that, let’s go over demo prerequisites.
Demo Prerequisites
minikubekubectl
Kubernetes Deployments fast rewind
We’ll base the demo on Kubernetes Deployments Demo we saw previously.
First, let’s create minikube multi-node cluster using:
minikube start --nodes 3 -p multinode-demoNow, let’s create nginx deployment using below command:
$ kubectl create deploy nginx --image=nginx:1.13.2
deployment.apps/nginx created
Make sure nginx app is running in our minikube Kubernetes cluster:
$ kubectl get all -l app=nginx
NAME                         READY   STATUS    RESTARTS   AGE
pod/nginx-6d67674bb5-xd52w   1/1     Running   0          61s

NAME                    READY   UP-TO-DATE   AVAILABLE   AGE
deployment.apps/nginx   1/1     1            1           61s

NAME                               DESIRED   CURRENT   READY   AGE
replicaset.apps/nginx-6d67674bb5   1         1         1       61s
Now, we would like to expose the deployment using Kubernetes service. We can of course declare nginx service using yaml. Though, this seems too daunting. So, what can we do? The answer is in the question 🙂 We can create Kubernetes service out of deployment using kubectl expose. Let’s see it in action:
$ kubectl expose deployment/nginx --port 8090 --target-port 80
service/nginx exposed
And of course, now we have Kubernetes service running:
$ kubectl get all -l app=nginx
NAME                         READY   STATUS    RESTARTS   AGE
pod/nginx-6d67674bb5-xd52w   1/1     Running   0          8m11s

NAME            TYPE        CLUSTER-IP       EXTERNAL-IP   PORT(S)    AGE
service/nginx   ClusterIP   10.110.111.105   <none>        8090/TCP   85s

NAME                    READY   UP-TO-DATE   AVAILABLE   AGE
deployment.apps/nginx   1/1     1            1           8m11s

NAME                               DESIRED   CURRENT   READY   AGE
replicaset.apps/nginx-6d67674bb5   1         1         1       8m11s
Will you see nginx welcome screen if you navigate to http://localhost:8090/? No because, the service is exposed only internally. It’s running on virtual ip 10.111.105. What can we do to expose the services externally? Right, use port-forwarding:
$ kubectl port-forward service/nginx 8090:8090Now, navigate to http://localhost:8090/ and you’ll see nginx welcome screen. Let’s stop port-forwarding for now (CTRL+C).
Declare Kubernetes services using yaml
Is there a way to see yaml of nginx Kubernetes service we created in the previous section? Of course. We can see yaml of any Kubernetes resource using kubectl get.
$ kubectl --kubeconfig ~/.kube/config get service/nginx -o yaml
apiVersion: v1
kind: Service
metadata:
 creationTimestamp: "2021-12-11T13:40:38Z"
 labels:
   app: nginx
 name: nginx
 namespace: default
 resourceVersion: "7004"
 uid: 2882c5de-d3c8-402d-823a-104b582d0318
spec:
 clusterIP: 10.110.111.105
 clusterIPs:
 - 10.110.111.105
 ipFamilies:
 - IPv4
 ipFamilyPolicy: SingleStack
 ports:
 - port: 8090
   protocol: TCP
   targetPort: 80
 selector:
   app: nginx
 sessionAffinity: None
 type: ClusterIP
status:
 loadBalancer: {}
There’s a lot of runtime information we’ll not cover here. Above service yaml can be shortened to below one if you intend to store it in git, for instance.
apiVersion: v1
kind: Service
metadata:
  name: nginx
spec:
  selector:
    app: nginx
  ports:
    - protocol: TCP
      port: 8090
      targetPort: 80
I’ll just point out selector which should match the label app: nginx. It’s the same selector we specified in the deployment spec.
Of course, we could declare nginx Kubernetes service using yaml. Yet, I find kubectl expose and kubectl get trick a preferred way for generating service yaml.
Let’s now demo Kubernetes services concepts like pods load balancing and access by DNS name.
Kubernetes Services Concepts in Action
As we mentioned above, Kubernetes services clients can access them by service name. In addition, services provide load balancing for pods. Let’s see both concepts in action.
For this purpose, let’s create serve_hostname deployment. Its pods return pod name when they are accessed at port 80.
$ kubectl create deployment hostnames --image=k8s.gcr.io/serve_hostname --replicas=3
deployment.apps/hostnames created
Next, let’s expose the pods via Kubernetes service.
$ kubectl expose deployment hostnames --port 9090 --target-port 9376
service/hostnames exposed
Now, let’s run busybox pod in the same namepace where we ran hostnames pods.
kubectl run --restart=Never busybox --image=gcr.io/google-containers/busybox -- sleep 7200
As you can see, busybox is going to sleep for 2 hours:
$ kubectl exec pod/busybox -- ps
PID   USER     COMMAND
    1 root     sleep 7200
   41 root     ps
Now, let’s access hostnamesbusybox pod using wget and print the result to stdout.
# demonstrate DNS resolution using wget in verbose mode
$ kubectl exec pod/busybox -- wget hostnames:8070 -O -
Connecting to hostnames:8070 (10.103.105.38:8070)
-                    100% |*******************************|    26   0:00:00 ETA
hostnames-f86f9ccc9-t4w8h

# demonstrate load balancing using wget in quiet mode
$kubectl exec pod/busybox -- wget hostnames:8070 -qO -
hostnames-f86f9ccc9-t4w8h
$ kubectl exec pod/busybox -- wget hostnames:8070 -qO -
hostnames-f86f9ccc9-nd4tj
$ kubectl exec pod/busybox -- wget hostnames:8070 -qO -
hostnames-f86f9ccc9-876nq
As you can see, DNS resolution works because hostnames service name is resolved to the virtual ip of the service. Next, load balancing works because different pods serve web requests directed at hostnames service. Nice! See more details about debugging Kubernetes services at Debug Services.
Note that, Kubernetes service default type is ClusterIP. That’s why load balancing applies only to internal service requests. In our case internal app wget in busybox pod accesses hostnames service. You may wonder what about external load balancing. For example, in case a user or another app tries to access Kubernetes service from outside the cluster. That’s a good question. We’ll see how to provide external access to services along with load-balancing in future posts. Then, we’ll cover Ingress and see examples in the cloud of LoadBalancer services.
Let’s clean all demo resources using kubectl delete [resource_name]. Note, that while deleting a deployment deletes its pods, the service stays. You have to delete it using kubectl delete svc name.
Finally, let’s stop our minikube cluster.
minikube stop -p multinode-demo
Summary
That’s it about Kubernetes services. Stay tuned for more Kubernetes related posts. And, as always, feel free to share and comment.
Bonus:
- Become a Certified Kubernetes Administrator (CKA)!
- Become a Certified Kubernetes Application Developer (CKAD)!
- BUNDLE KUBERNETES FUNDAMENTALS & CKA CERTIFICATION (COURSE & CERTIFICATION) FOR THE BEST DEAL! $499 ONLY!
Recommended Kubernetes courses on Pluralsight:
- Configuring and Managing Kubernetes Networking, Services, and Ingress
- Managing the Kubernetes API Server and Pods
Sign up using this link to get exclusive discounts like 50% off your first month or 15% off an annual subscription)
Recommended Kubernetes books on Amazon: